When it comes to embedding a 3D viewer with motion effects on a website, there’s no shortage of methods – from Wordpress plugins and custom code to API integration and more.
However, if your website is powered by WordPress and utilizes the Elementor website builder plugin, you’re in for a straightforward experience.
In fact, you’ll discover that the process is not only straightforward but also attainable with just the free version of Elementor and a basic understanding of HTML blocks. No need for technical web knowledge.
In this comprehensive guide, we’ll guide you through the entire process, systematically breaking it down into simple, easily manageable steps.
But our integration prowess doesn’t stop at Elementor. Explore our blog posts on embedding for Wordpress, Shopify, Duda, and Wix as well.
Don’t want to read? Here’s a video summary we made:

A 3D model viewer is a tool that enables customers to interact with products in a virtual space, offering a dynamic and immersive experience.
It allows users to manipulate, zoom, and rotate the product from different angles, providing a realistic representation and a deeper understanding of the product’s origin and its features than with product images. Try it out here:
Using 3D model viewers in e-commerce has significant advantages. They offer a more realistic representation of product media than traditional images, allowing customers to examine every detail.
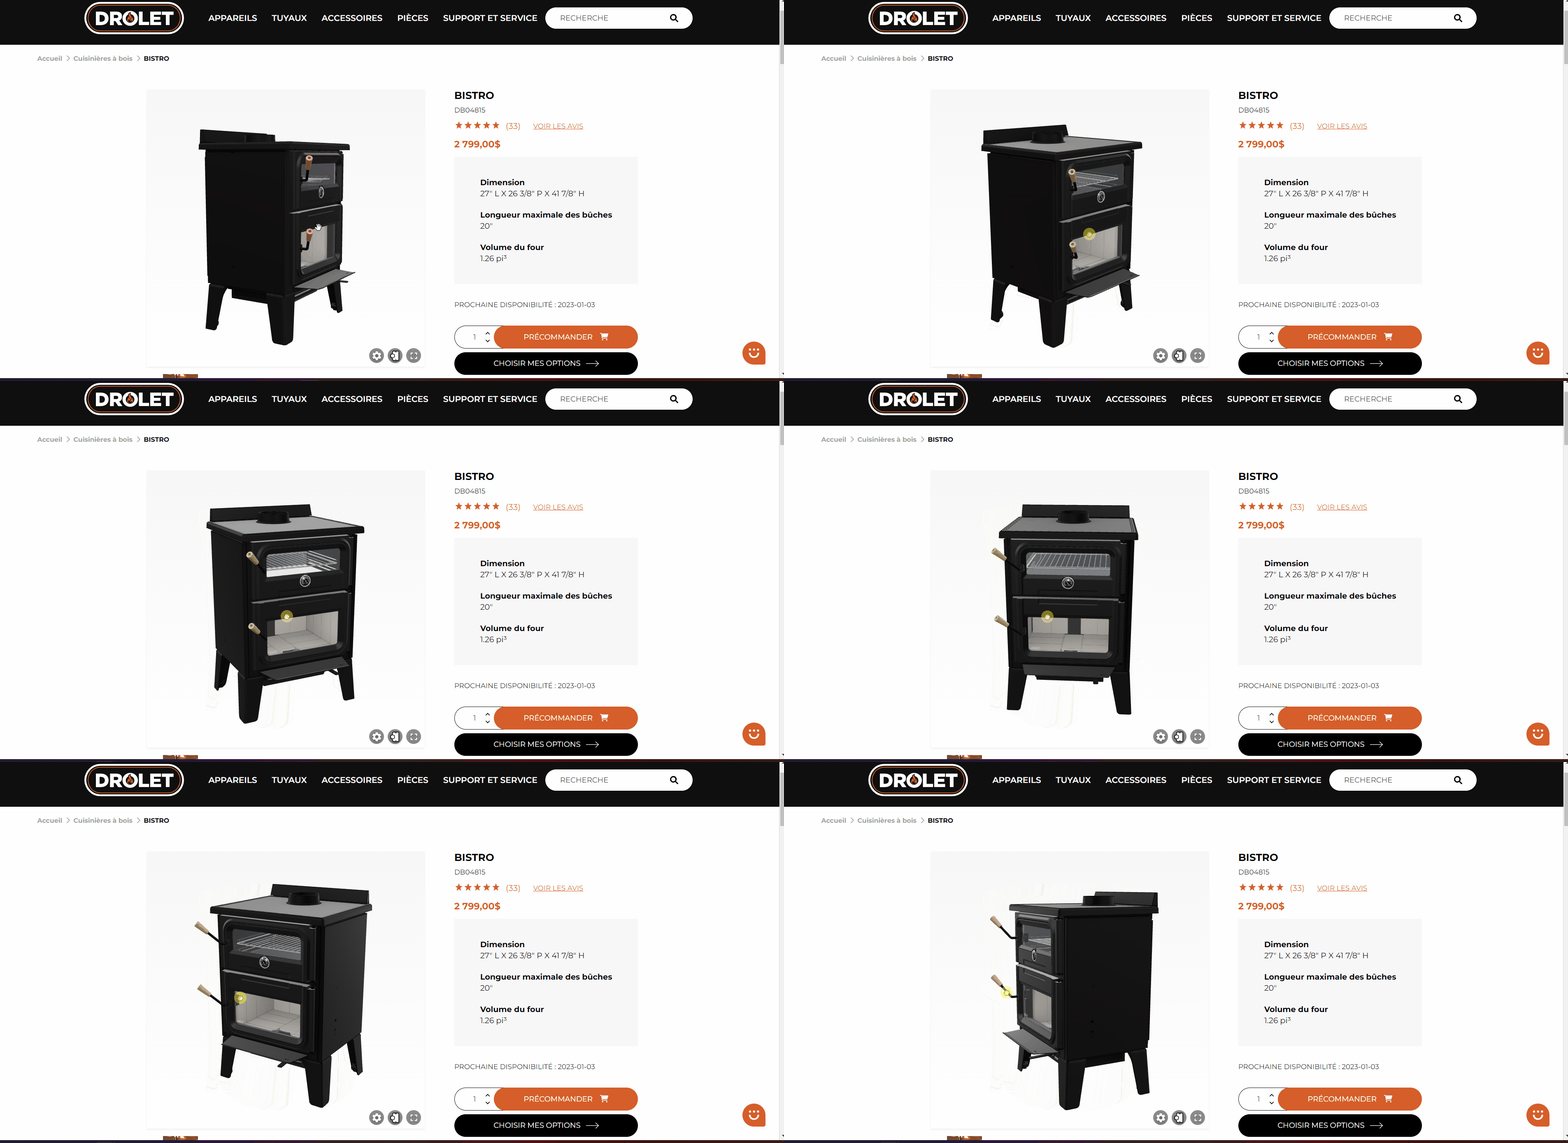
Additionally, 3D model viewers enable better visualization, helping customers assess size, proportions, and aesthetics accurately. As an illustration, consider our client Drolet, who integrated digital replicas of their fireplaces on each product page.
The most efficient and user-friendly approach to displaying 3D models with motion effects on a webpage is by utilizing an HTML iframe script.
To provide some context, an iframe serves as a frame that facilitates the presentation of one HTML page within another.
As exemplified in the illustration above, an iframe can be utilized to effortlessly integrate third-party source software, like a video player plugin for websites such as YouTube, into a blog post or webpage.
P.S. It’s worth noting that this functionality extends to touch screen-enabled devices as well!
This visual representation highlights the various elements comprising an iframe code script for 3D content.
In the majority of instances, no alterations are required, as the code already encompasses essential attributes and properties essential for the presentation of 3D models.
These encompass elements such as the source URL, width, height, and styles, ensuring that embedding a 3D product viewer is a smooth and trouble-free process.
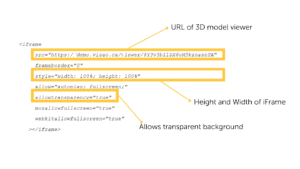
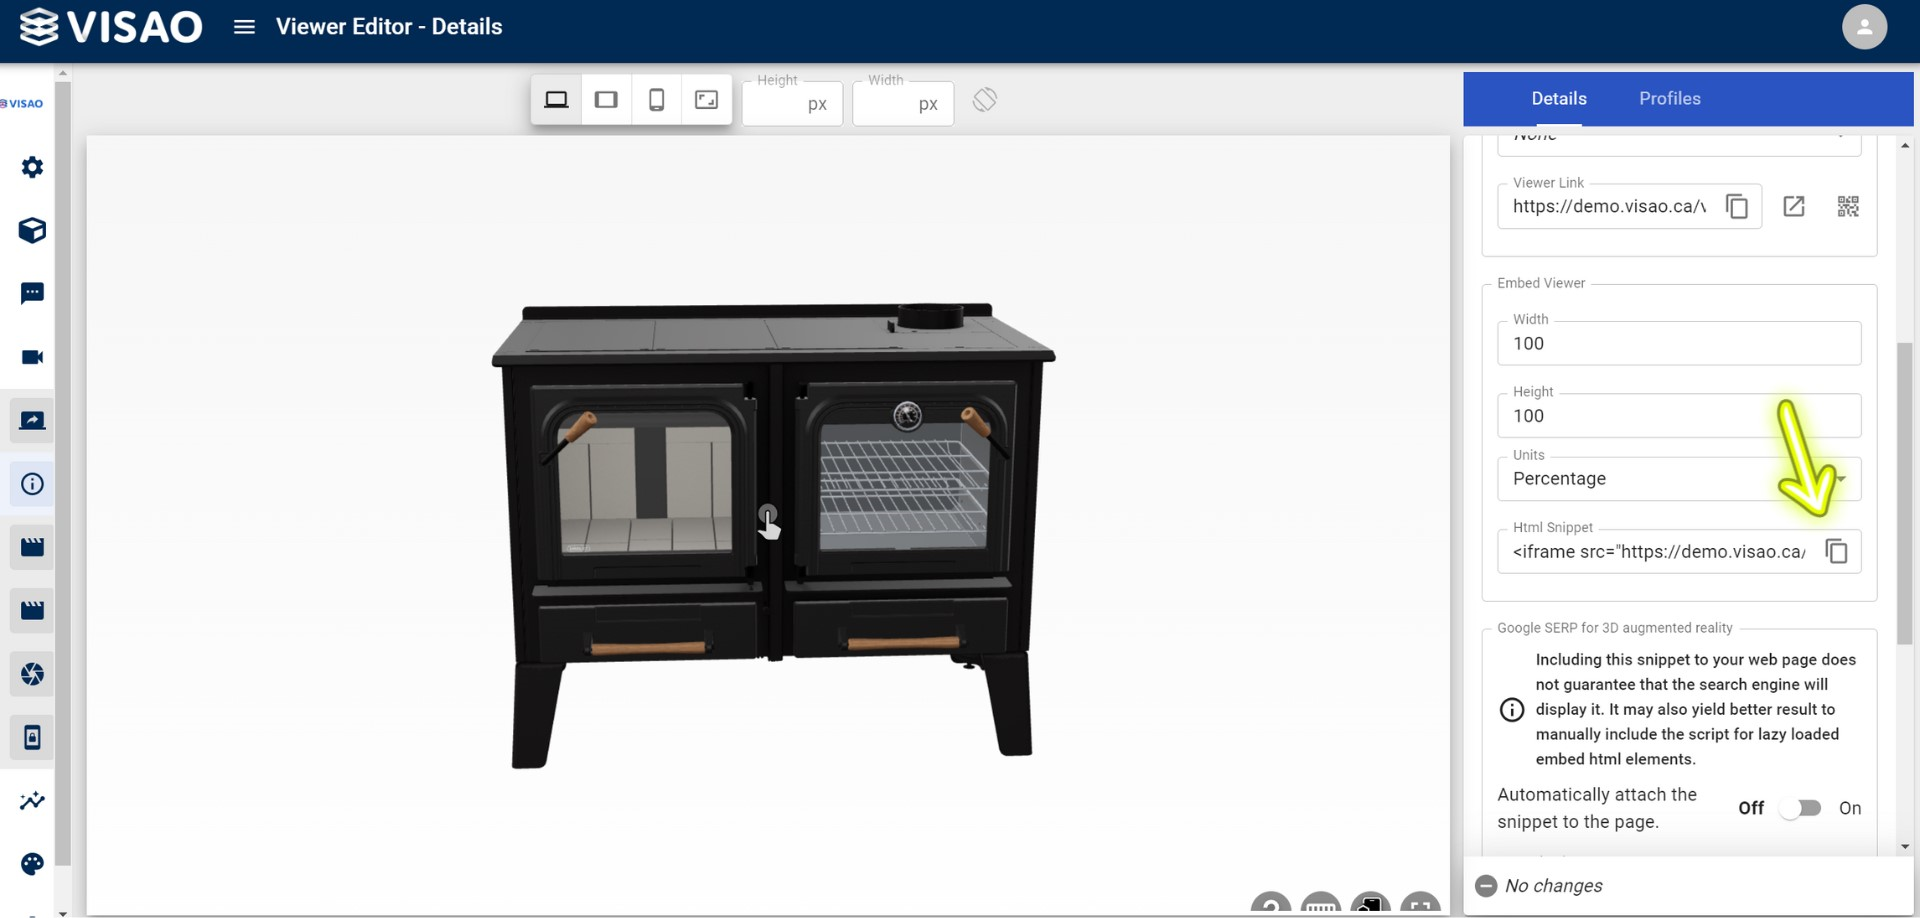
The 3D specialists at Visao recommend making optimal use of the full width and height of the HTML container instead of confining it to fixed pixel dimensions. This is precisely why the earlier mentioned example utilizes the style attribute with the values “width: 100%; height: 100%.”
However, if you have a preference for customizing the dimensions of the 3D model viewer, you have the flexibility to do so by assigning specific pixel values to individual elements.
As illustrated in the subsequent example, you can set the width to 500 pixels and the height to 350 pixels by specifying the style attribute as “width: 500px; height: 350px.”
Does an iFrame have an impact on SEO?
When you are making use of Visao’s 3D model creation software, the iframe code script is auto-generated for you. To obtain this code, follow these simple steps: Within the software, head to the “Viewer” section, and select the “Edit” icon.
Subsequently, click on the copy icon situated on the right side of the screen to replicate the generated iframe code.
If you are not using Visao’s software you can use the following template. Just replace the 3D model URL with your own.
<iframe src=”https://demo.visao.ca/viewer/2xr-ROnGQimVD3N7gaKmcA?lang=en” title=”Marketing – Foyer SBI” style=”border: none; width: 100%; height: 100%;” allow=”autoplay; fullscreen; transparency; vr;”></iframe>
In order to seamlessly integrate the 3D content with motion effects into your Elementor webpage or other websites, insert the generated iframe code into the appropriate section of your site.
Navigate to your WordPress site dashboard menu to access website editing features.

Click on the link under the “Pages” tab in the left menu.

Click on the page and then the part of the page you want to edit.
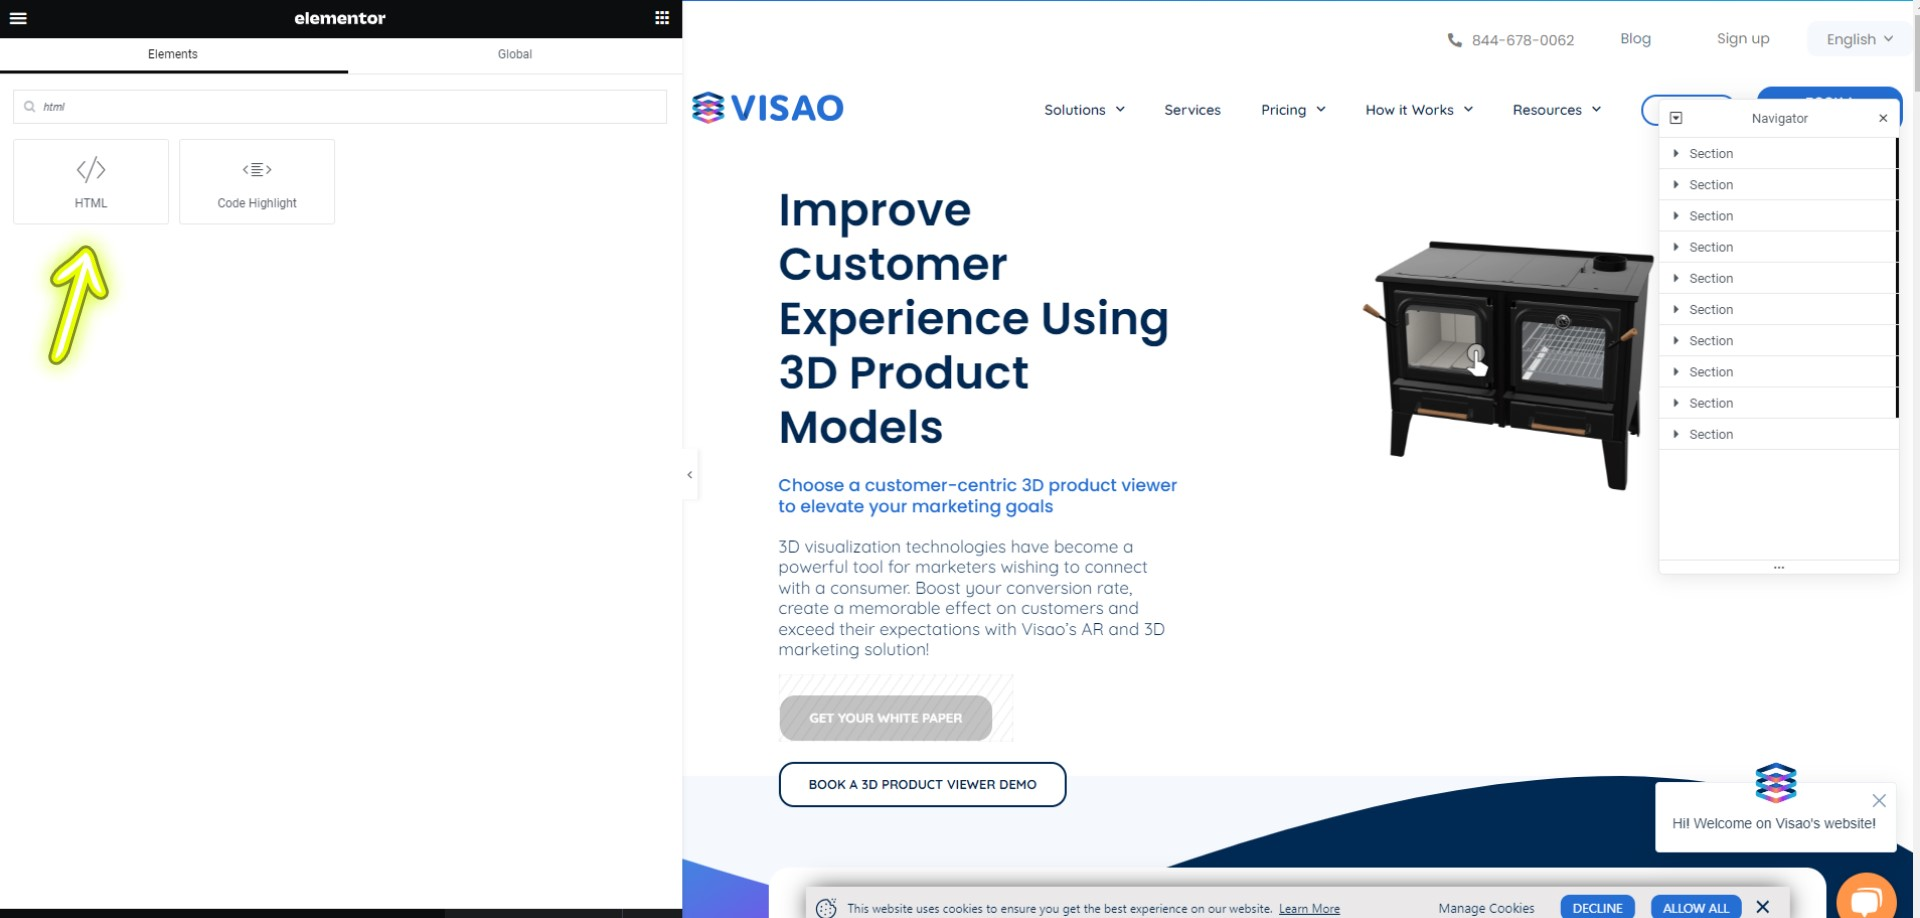
Within the Elementor toolbar, search for and create the HTML block using the search function and then proceed to drag it to your desired location on the web page to create the integration.
Why consider 3D visualization software as a marketing solution?
Simply upload and paste the generated shortcode into the designated field.
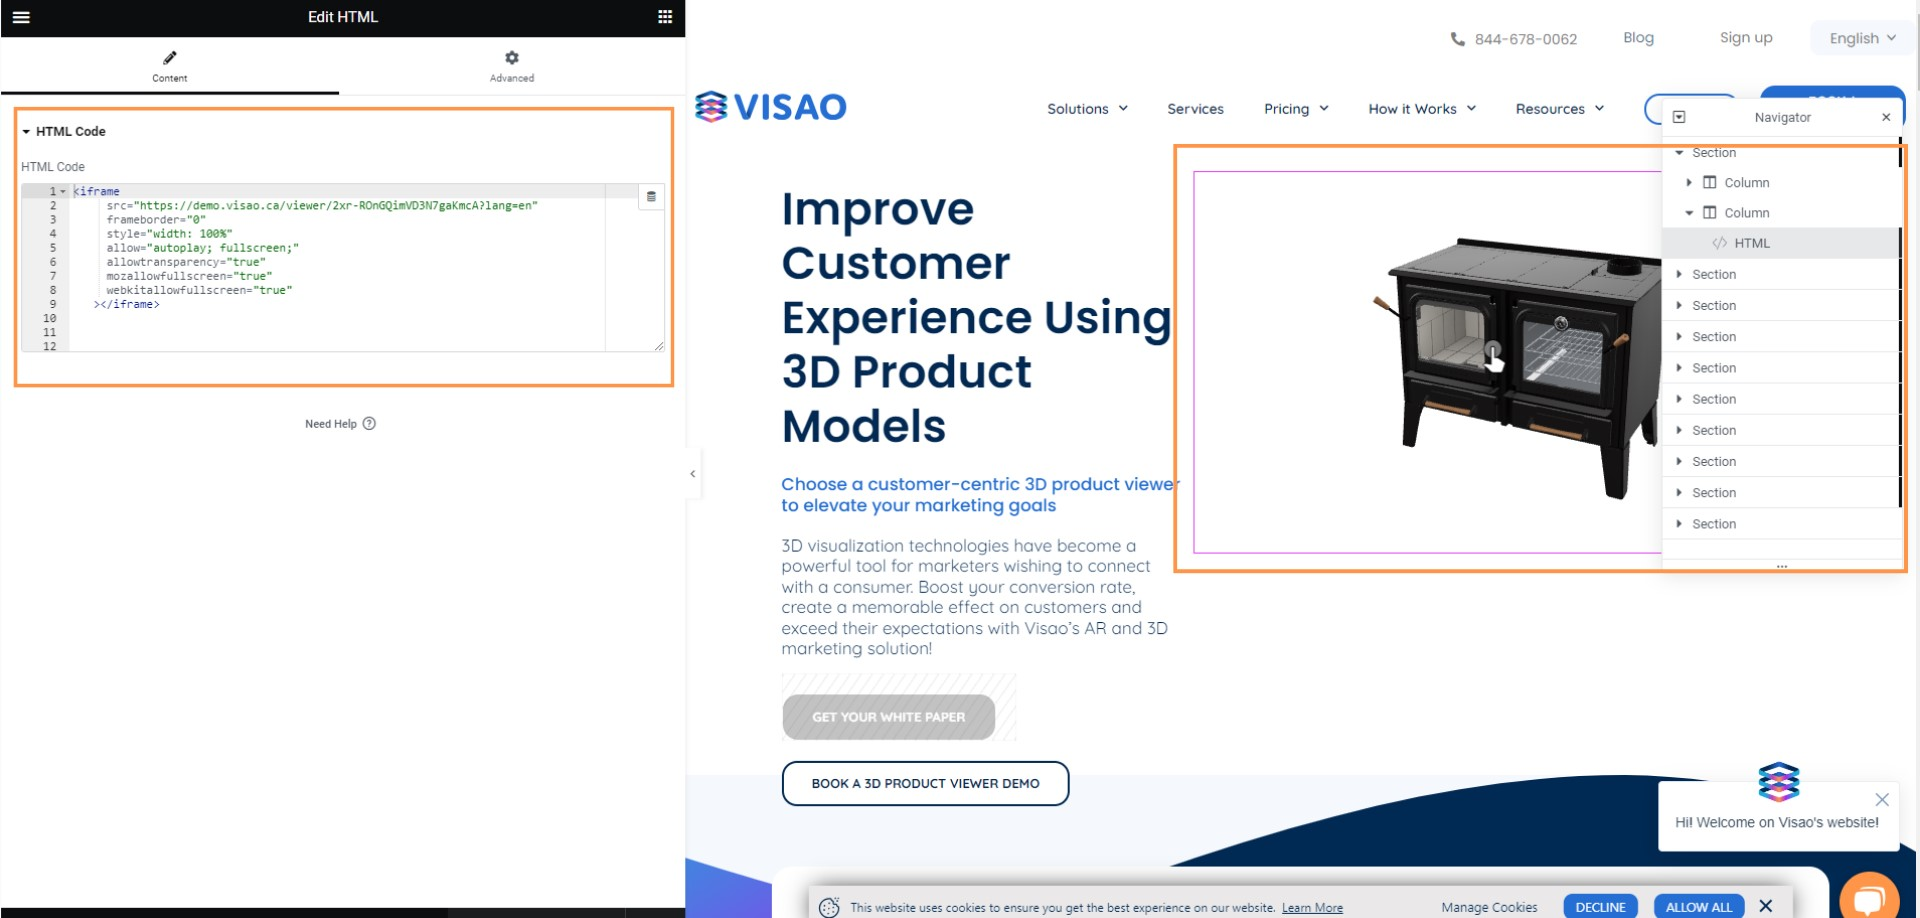
Save the modifications by selecting the “Publish” button. Your 3D viewer with motion effects will now be visible on your Elementor-built website.

No, you do not. By hosting the 3D viewer on an external domain, you can create it without the need to link or upload it to the Media Library.